Linux之glibc2.17版本升级至2.31
一、需求说明
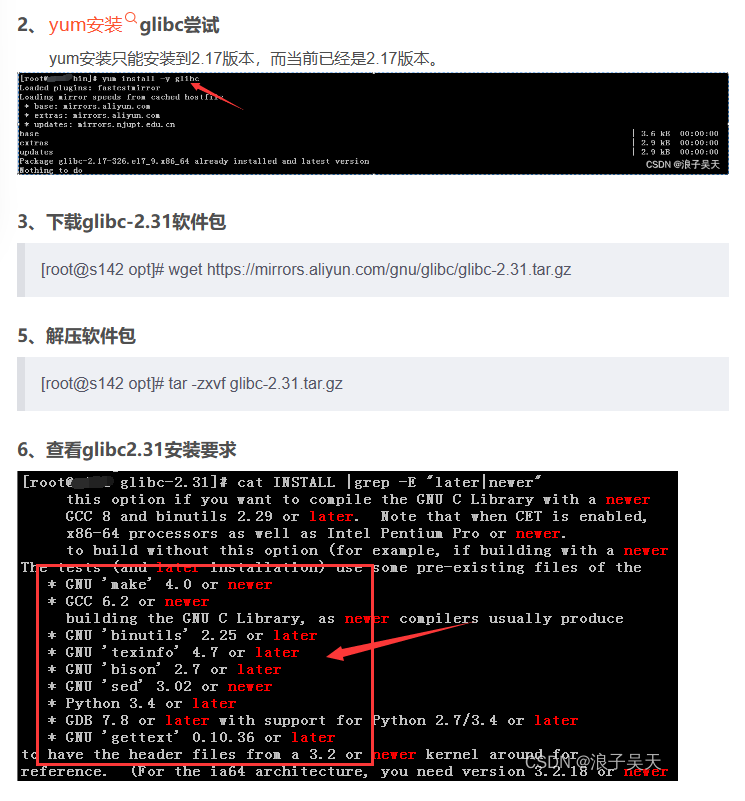
研发python开发引入pyTSL模块时报错,ImportError: /lib64/libc.so.6: version `GLIBC_2.25’ not found。因为操作系统当前的版本为GLIBC_2.17,需要将GLIBC进行升级。因为yum安装只能安装到2.17版本,所有只能采用源码升级的方式进行。环境说明:
操作系统版本:CentOS Linux release 7.6.1810 (Core)
glibc版本:升级前2.17,升级后2.31
python版本:升级前2.7.5,升级后3.4.10
gcc版本:升级前4.8.5,升级后9.3.0
make版本:升级前3.82,升级后4.3
注意,glibc版本升级可能导致操作系统无法使用,所以请务必谨慎操作,先在同版本操作系统系统模拟测试,将glibc新版本所依赖的软件完成升级后再行升级。博文实验的时候最初计划是升级到2.25版本,但是安装INSTALL文件完成相关依赖升级后编译安装glibc的时候还是各种报错。最后直接安装glibc2.31的安装要求升级了依赖软件并完成了glibc2.31版本的安装。
二、升级步骤
1、检查当前glibc版本
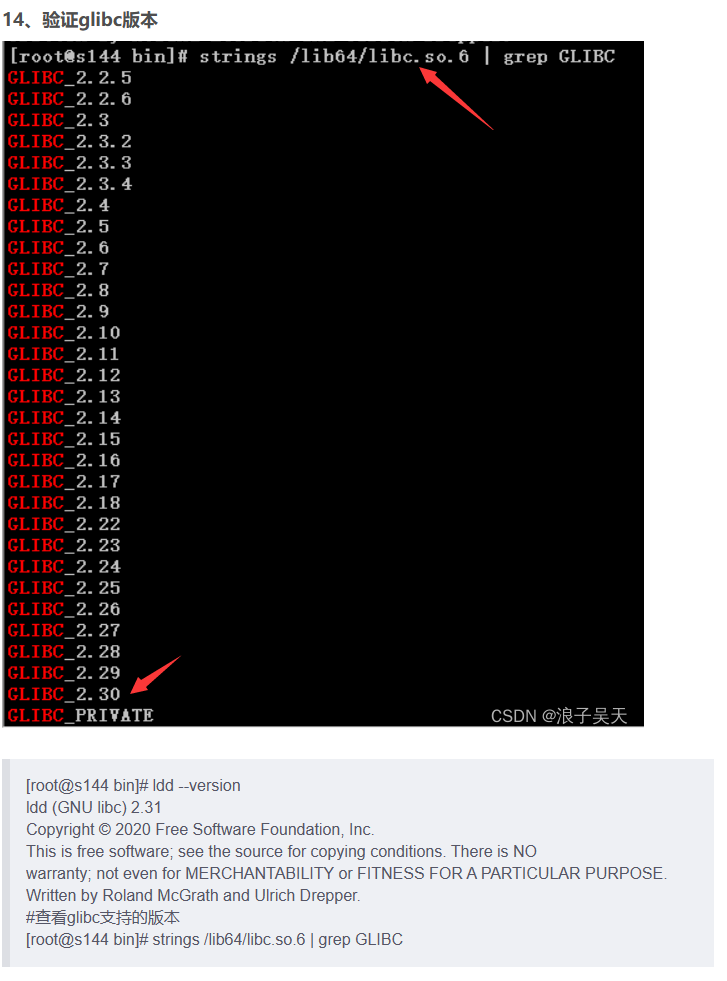
[root@s144 glibc-2.25]# ldd --version
ldd (GNU libc) 2.17
Copyright © 2012 Free Software Foundation, Inc.
This is free software; see the source for copying conditions. There is NO
warranty; not even for MERCHANTABILITY or FITNESS FOR A PARTICULAR PURPOSE.
Written by Roland McGrath and Ulrich Drepper.
————————————————
通过查看INSTALL文件我们可以知道安装glibc2.25的要求,需要python版本2.7.6以上,gcc版本4.7以上,make版本3.79以上。
[root@s142 glibc-2.25]# cat INSTALL | grep -E “newer|later”
7、检查python/gcc/gdb/make软件版本
#检查tpyhon/gcc/make软件版本,可以看到操作系统centos7.6环境下python、gdb不满足要求。
[root@s144 opt]# cat /etc/centos-release
CentOS Linux release 7.6.1810 (Core)
[root@s144 opt]# python -V
Python 2.7.5
[root@s144 opt]# gcc -v
…
gcc version 4.8.5 20150623 (Red Hat 4.8.5-44) (GCC)
[root@s144 opt]# make -v
GNU Make 3.82
…
[root@s144 opt]# gdb -v
GNU gdb (GDB) Red Hat Enterprise Linux 7.6.1-120.el7
8、升级gdb
升级到2.31版本,没有遇到gdb的报错问题,可能是因为直接升级了python只3.4以上。如果升级到2.25会有要求gdb版本太老的报错,升级gdb见博文Linux之gdb安装和升级。
9、升级python
博主也进行了yum安装python尝试,发现只可以安装python-2.7.5-90.el7.x86_64版本,因为要求python3.4以后版本,所以采用源码安装方式。Linux之python版本升级
[root@s144 build]# python -V
Python 3.4.10
10、升级gcc到9.3.0
gcc升级步骤可以参考博文Linux之gcc源码安装步骤
#下载软件包
wget https://mirrors.aliyun.com/gnu/gcc/gcc-9.3.0/gcc-9.3.0.tar.gz
#解压依赖包
tar -zxf gcc-9.3.0.tar.gz
cd gcc-9.3.0/
#下载4个依赖包
./contrib/download_prerequisites
#预编译
mkdir build
cd build
…/configure --enable-checking=release --enable-language=c,c++ --disable-multilib --prefix=/usr
#查看cpu核数
cat /proc/cpuinfo| grep “processor”| wc -l
#-j4中的数字为cpu核数,及并发工作任务数量,可以提高编译效率
make -j4
#编译安装
make install
#检查gcc版本
[root@s144 build]# gcc -v
Using built-in specs.
COLLECT_GCC=gcc
COLLECT_LTO_WRAPPER=/usr/libexec/gcc/x86_64-pc-linux-gnu/9.3.0/lto-wrapper
Target: x86_64-pc-linux-gnu
Configured with: …/configure --enable-checking=release --enable-language=c,c++ --disable-multilib --prefix=/usr
Thread model: posix
gcc version 9.3.0 (GCC)
11、升级make到4.3
[root@s144 opt]# wget https://mirrors.aliyun.com/gnu/make/make-4.3.tar.gz
[root@s144 opt]# tar -zxf make-4.3.tar.gz
[root@s144 opt]# cd make-4.3/
[root@s144 opt]# mkdir build
[root@s144 opt]# cd build
.[root@s144 opt]# ./configure --prefix=/usr
[root@s144 opt]#make
[root@s144 opt]#make install
…
[root@s144 build]# make -v
GNU Make 4.3
…
10、预编译glibc2.31
[root@s144 glibc-2.31]# cd build/
[root@s144 build]# …/configure --prefix=/usr --disable-profile --enable-add-ons --with-headers=/usr/include --with-binutils=/usr/bin --disable-sanity-checks --disable-werror
…
configure: creating ./config.status
config.status: creating config.make
config.status: creating Makefile
config.status: creating config.h
config.status: executing default commands
11、编译glibc2.31
[root@s144 build]# make -j4
…
make[2]: Leaving directory `/opt/glibc-2.25/elf’
make[1]: Leaving directory `/opt/glibc-2.31’
12、安装glibc2.31
[root@s142 build]# make install
…
13、安装locale
[root@s144 build]# make localedata/install-locales
make -r PARALLELMFLAGS=“” -C … objdir=`pwd` localedata/install-locales
make[1]: Entering directory ‘/opt/glibc-2.31’
…
zu_ZA.UTF-8… done
zu_ZA.ISO-8859-1… done
make[2]: Leaving directory ‘/opt/glibc-2.31/localedata’
make[1]: Leaving directory ‘/opt/glibc-2.31’
————————————————
三、QA
1、编译时报错configure: error: you must configure in a separate build directory
报错原因:直接在glibc-2.31目录下编译
解决方案:新建一个目录,在新建目录下编译
[root@s144 glibc-2.31]# mkdir build
[root@s144 glibc-2.31]# cd build
[root@s144 build]# …/glibc-2.31/configure
————————————————
如果您发现该资源为电子书等存在侵权的资源或对该资源描述不正确等,可点击“私信”按钮向作者进行反馈;如作者无回复可进行平台仲裁,我们会在第一时间进行处理!
- 最近热门资源
- 银河麒麟桌面操作系统V10SP1-2403-update1版本中,通过“麒麟管家-设备管理-硬件信息-硬盘”查看硬盘类型时,显示的是HDD(机械硬盘),而实际上该笔记本的硬盘类型为SSD 81
- 以openkylin为例编译安装内核 77
- 分享解决宏碁电脑关机时自动重启的方法 73
- 统信uosboot区分未挂载导致更新备份失败 63
- 分享如何解决报错:归档 xxx.deb 对成员 control.tar.zst 使用了未知的压缩,放弃操作 63
- 统信uos安装mysql的实例参考 60
- 格之格打印机dp3300系列国产系统uos打印机驱动选择 57
- 在银河麒麟高级服务器操作系统V10SP3中,需要将默认shell类型修改为csh。 51
- MySQL国产平替最佳选择---万里数据库(GreatDB) 45
- 最近下载排行榜
- 银河麒麟桌面操作系统V10SP1-2403-update1版本中,通过“麒麟管家-设备管理-硬件信息-硬盘”查看硬盘类型时,显示的是HDD(机械硬盘),而实际上该笔记本的硬盘类型为SSD 0
- 以openkylin为例编译安装内核 0
- 分享解决宏碁电脑关机时自动重启的方法 0
- 统信uosboot区分未挂载导致更新备份失败 0
- 分享如何解决报错:归档 xxx.deb 对成员 control.tar.zst 使用了未知的压缩,放弃操作 0
- 统信uos安装mysql的实例参考 0
- 格之格打印机dp3300系列国产系统uos打印机驱动选择 0
- 在银河麒麟高级服务器操作系统V10SP3中,需要将默认shell类型修改为csh。 0
- MySQL国产平替最佳选择---万里数据库(GreatDB) 0


