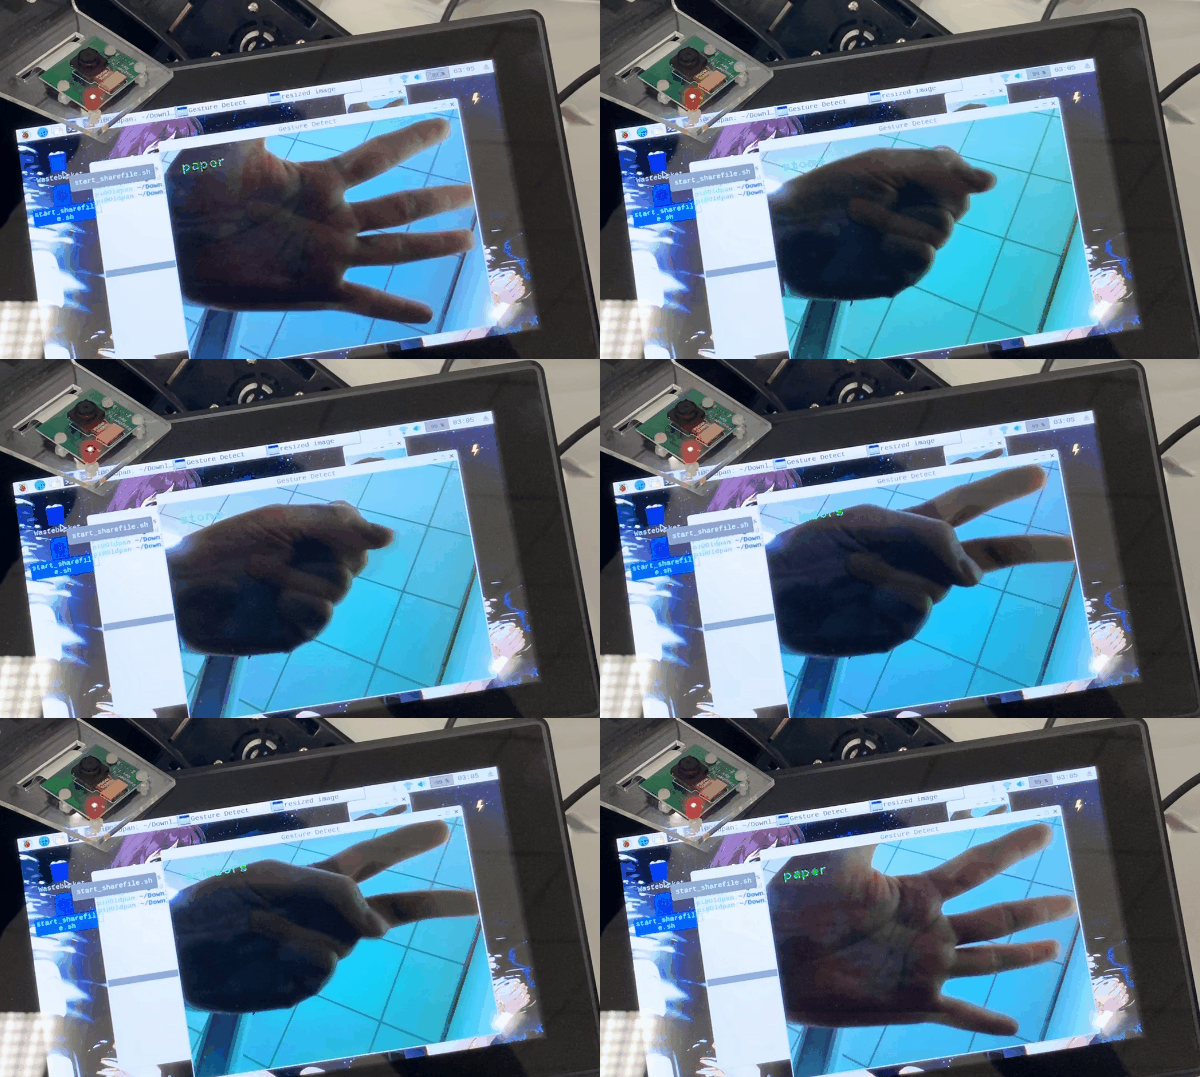
在PC端利用TVM部署C++模型
在PC端利用TVM部署C++模型
如何利用TVM的C++端去部署,官方也有比较详细的文档,这里我们利用TVM和OpenCV读取一张图片,并且使用之前导出的动态链接库去运行神经网络对这张图片进行推断。
我们需要的头文件为:
#include <cstdio>
#include <dlpack/dlpack.h>
#include <opencv4/opencv2/opencv.hpp>
#include <tvm/runtime/module.h>
#include <tvm/runtime/registry.h>
#include <tvm/runtime/packed_func.h>
#include <fstream>其实这里我们只需要TVM的运行时,另外dlpack是存放张量的一个结构。其中OpenCV用于读取图片,而fstream则用于读取json和参数信息:
tvm::runtime::Module mod_dylib =
    tvm::runtime::Module::LoadFromFile("../files/mobilenet.so");

std::ifstream json_in("../files/mobilenet.json", std::ios::in);
std::string json_data((std::istreambuf_iterator<char>(json_in)), std::istreambuf_iterator<char>());
json_in.close();

// parameters in binary
std::ifstream params_in("../files/mobilenet.params", std::ios::binary);
std::string params_data((std::istreambuf_iterator<char>(params_in)), std::istreambuf_iterator<char>());
params_in.close();

TVMByteArray params_arr;
params_arr.data = params_data.c_str();
params_arr.size = params_data.length();在读取完信息之后,我们要利用之前读取的信息,构建TVM中的运行图(Graph_runtime):
int dtype_code = kDLFloat;
int dtype_bits = 32;
int dtype_lanes = 1;
int device_type = kDLCPU;
int device_id = 0;

tvm::runtime::Module mod = (*tvm::runtime::Registry::Get("tvm.graph_runtime.create"))
(json_data, mod_dylib, device_type, device_id);然后利用TVM中函数建立一个输入的张量类型并且为它分配空间:
DLTensor *x;
int in_ndim = 4;
int64_t in_shape[4] = {1, 3, 128, 128};
TVMArrayAlloc(in_shape, in_ndim, dtype_code, dtype_bits, dtype_lanes, device_type, device_id, &x);其中DLTensor是个灵活的结构,可以包容各种类型的张量,而在创建了这个张量后,我们需要将OpenCV中读取的图像信息传入到这个张量结构中:
// 这里依然读取了papar.png这张图
image = cv::imread("/home/prototype/CLionProjects/tvm-cpp/data/paper.png");

cv::cvtColor(image, frame, cv::COLOR_BGR2RGB);
cv::resize(frame, input,  cv::Size(128,128));

float data[128 * 128 * 3];
// 在这个函数中 将OpenCV中的图像数据转化为CHW的形式
Mat_to_CHW(data, input);需要注意的是,因为OpenCV中的图像数据的保存顺序是(128,128,3),所以这里我们需要将其调整过来,其中Mat_to_CHW函数的具体内容是:
void Mat_to_CHW(float *data, cv::Mat &frame)
{
    assert(data && !frame.empty());
    unsigned int volChl = 128 * 128;

    for(int c = 0; c < 3; ++c)
    {
        for (unsigned j = 0; j < volChl; ++j)
            data[c*volChl + j] = static_cast<float>(float(frame.data[j * 3 + c]) / 255.0);
    }

}当然别忘了除以255.0因为在Pytorch中所有的权重信息的范围都是0-1。
在将OpenCV中的图像数据转化后,我们将转化后的图像数据拷贝到之前的张量类型中:
// x为之前的张量类型 data为之前开辟的浮点型空间
memcpy(x->data, &data, 3 * 128 * 128 * sizeof(float));然后我们设置运行图的输入(x)和输出(y):
// get the function from the module(set input data)
tvm::runtime::PackedFunc set_input = mod.GetFunction("set_input");
set_input("0", x);

// get the function from the module(load patameters)
tvm::runtime::PackedFunc load_params = mod.GetFunction("load_params");
load_params(params_arr);

DLTensor* y;
int out_ndim = 2;
int64_t out_shape[2] = {1, 3,};
TVMArrayAlloc(out_shape, out_ndim, dtype_code, dtype_bits, dtype_lanes, device_type, device_id, &y);

// get the function from the module(run it)
tvm::runtime::PackedFunc run = mod.GetFunction("run");

// get the function from the module(get output data)
tvm::runtime::PackedFunc get_output = mod.GetFunction("get_output");此刻我们就可以运行了:
run();
get_output(0, y);

// 将输出的信息打印出来
auto result = static_cast<float*>(y->data);
for (int i = 0; i < 3; i++)
cout<<result[i]<<endl;最后的输出信息是
13.8204
-7.31387
-6.8253可以看到,成功识别出了布这张图片,到底为止在C++端的部署就完毕了。
在树莓派上的部署
在树莓派上的部署其实也是很简单的,与上述步骤中不同的地方是我们需要设置target为树莓派专用:
target = tvm.target.arm_cpu('rasp3b')我们点进去其实可以发现rasp3b对应着-target=armv7l-linux-gnueabihf:
trans_table = {
    "pixel2":    ["-model=snapdragon835", "-target=arm64-linux-android -mattr=+neon"],
    "mate10":    ["-model=kirin970", "-target=arm64-linux-android -mattr=+neon"],
    "mate10pro": ["-model=kirin970", "-target=arm64-linux-android -mattr=+neon"],
    "p20":       ["-model=kirin970", "-target=arm64-linux-android -mattr=+neon"],
    "p20pro":    ["-model=kirin970", "-target=arm64-linux-android -mattr=+neon"],
    "rasp3b":    ["-model=bcm2837", "-target=armv7l-linux-gnueabihf -mattr=+neon"],
    "rk3399":    ["-model=rk3399", "-target=aarch64-linux-gnu -mattr=+neon"],
    "pynq":      ["-model=pynq", "-target=armv7a-linux-eabi -mattr=+neon"],
    "ultra96":   ["-model=ultra96", "-target=aarch64-linux-gnu -mattr=+neon"],
}还有一点改动的是,我们在导出.so的时候需要加入cc="/usr/bin/arm-linux-gnueabihf-g++",此时的/usr/bin/arm-linux-gnueabihf-g++为之前下载的交叉编译器。
path_lib = '../tvm/deploy_lib.so'
lib.export_library(path_lib, cc="/usr/bin/arm-linux-gnueabihf-g++")这时我们就可以导出来树莓派需要的几个文件,之后我们将这几个文件移到树莓派中,随后利用上面说到的C++部署代码去部署就可以了。

网站声明:如果转载,请联系本站管理员。否则一切后果自行承担。
- 上周热门
- 银河麒麟添加网络打印机时,出现“client-error-not-possible”错误提示 1323
- 银河麒麟打印带有图像的文档时出错 1236
- 银河麒麟添加打印机时,出现“server-error-internal-error” 1022
- 统信桌面专业版【如何查询系统安装时间】 951
- 统信操作系统各版本介绍 944
- 统信桌面专业版【全盘安装UOS系统】介绍 902
- 麒麟系统也能完整体验微信啦! 889
- 统信【启动盘制作工具】使用介绍 499
- 统信桌面专业版【一个U盘做多个系统启动盘】的方法 440
- 信刻全自动档案蓝光光盘检测一体机 386
- 本周热议
- 我的信创开放社区兼职赚钱历程 40
- 今天你签到了吗? 27
- 信创开放社区邀请他人注册的具体步骤如下 15
- 如何玩转信创开放社区—从小白进阶到专家 15
- 方德桌面操作系统 14
- 我有15积分有什么用? 13
- 用抖音玩法闯信创开放社区——用平台宣传企业产品服务 13
- 如何让你先人一步获得悬赏问题信息?(创作者必看) 12
- 2024中国信创产业发展大会暨中国信息科技创新与应用博览会 9
- 中央国家机关政府采购中心:应当将CPU、操作系统符合安全可靠测评要求纳入采购需求 8

