环境搭建-Apache、PHP
环境搭建-Apache、PHP
目录
-
1、安装Apache
-
1.1、下载
-
1.2、解压
-
1.3、安装
-
1.4、启动、停止、重启
-
1.5、浏览器访问站点
-
1.6、添加到系统服务
-
1.7、路径信息
-
2、安装PHP
-
2.1、下载
-
2.2、解压
-
2.3、安装
-
2.4、配置文件php.ini
-
2.5、配置Apache服务解析PHP文件
本篇主要讲解在CentOS环境下进行搭建部署
1.1、下载
下载地址:
http://archive.apache.org/dist/httpd/
例如下载httpd-2.4.48.tar.gz

并将已下载的文件上传到服务器上

或者直接输入命令,在服务器上进行下载
wget http://archive.apache.org/dist/httpd/httpd-2.4.48.tar.gz
1.2、解压
tar -xvf httpd-2.4.48.tar.gz
解压后生成httpd-2.4.48目录,并进入此目录

目录文件

1.3、安装
1、配置安装选项
./configure --prefix=/usr/local/httpd --enable-so --with-apr=/usr/local/apr --with-apr-util=/usr/local/apr-util/ --with-pcre=/usr/local/pcre
2、编译
make
3、编译安装
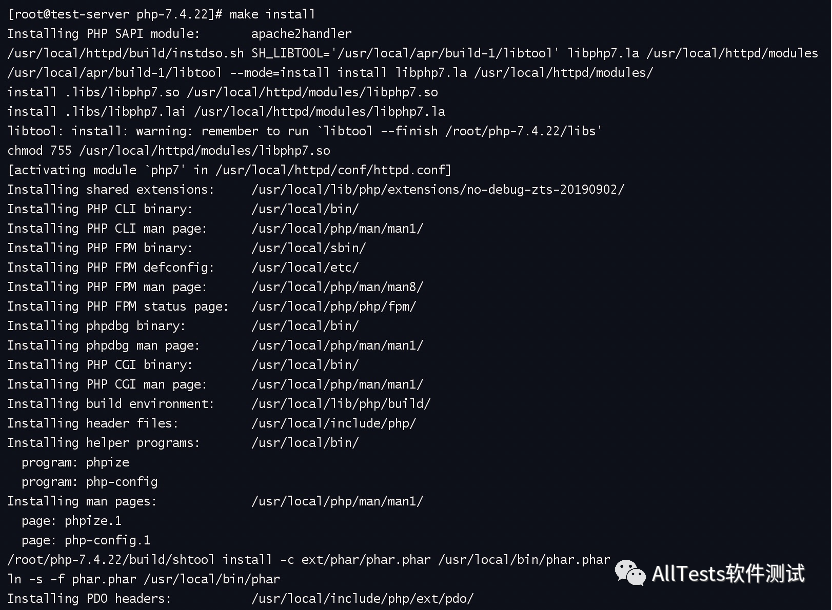
make install
1.4、启动、停止、重启
1、启动服务
/usr/local/httpd/bin/apachectl start
如果提示:AH00558: httpd: Could not reliably determine the server's fully qualified domain name, using xxx.xxx.xxx.xxx. Set the 'ServerName' directive globally to suppress this message

解决方法:修改配置文件(httpd.conf)
vi /usr/local/httpd/conf/httpd.conf
将 ServerName www.example.com:80
修改为 ServerName localhost:80 即可

2、停止服务
/usr/local/httpd/bin/apachectl stop
3、重启服务
/usr/local/httpd/bin/apachectl restart
1.5、浏览器访问站点
查看服务器主机ip地址
ip addr

浏览器访问 http://服务器ip地址(端口默认80),页面出现It works!,则表示Apache运行成功。

注:如果无法访问站点服务,可查看是否因防火墙开启所阻碍,或者添加防火墙开放端口。
防火墙相关命令:
1、开启防火墙
systemctl start firewalld.service
2、关闭防火墙
systemctl stop firewalld.service
3、禁止firewall开机启动
systemctl disable firewalld.service
4、查看防火墙状态
systemctl status firewalld.service
5、防火墙已开启,添加防火墙开放端口(例如80)
firewall-cmd --add-port=80/tcp --permanent
firewall-cmd --reload

6、查看防火墙所有放行的端口
firewall-cmd --list-ports

1.6、添加到系统服务
cp /usr/local/httpd/bin/apachectl /etc/init.d/httpd
vim /etc/init.d/httpd
在文件开头加入下面几行:
# chkconfig: 35 85 15
# description: Apache server.

保存退出,之后输入如下命令
chmod +x /etc/init.d/httpd
chkconfig --add httpd
chkconfig httpd on

之后就可以使用服务命令了
1、启动服务
service httpd start
2、停止服务
service httpd stop
3、重启服务
service httpd restart
1.7、路径信息
安装路径:
/usr/local/httpd
配置文件路径:
/usr/local/httpd/conf/httpd.conf
网站文件默认访问路径:
/usr/local/httpd/htdocs
2.1、下载
官网地址:
https://www.php.net/
下载地址:
https://www.php.net/downloads
将已下载的文件上传到服务器上
或者直接输入命令,在服务器上进行下载(例如版本7.4.22)
wget https://www.php.net/distributions/php-7.4.22.tar.gz
2.2、解压
tar -zxvf php-7.4.22.tar.gz
解压后,生成php-7.4.22目录,并进入此目录

2.3、安装
1、配置安装选项
./configure --with-iconv-dir=/usr/local --with-apxs2=/usr/local/httpd/bin/apxs --with-freetype --with-jpeg --with-zlib --disable-rpath --enable-bcmath --enable-shmop --enable-sysvsem --with-curl --enable-fpm --enable-mbstring --with-openssl --with-mhash --enable-pcntl --enable-sockets --with-ldap --with-ldap-sasl --with-xmlrpc --enable-soap --enable-gd --with-pdo-mysql
配置安装完成后

2、编译
make
编译完成后

3、编译安装
make install
编译安装完成后

如果在安装后想改变配置选项,添加功能模块,只需重新 ./configure 加上需要的功能模块,之后 make,之后 make install 就可以了,最后重新启动 Apache 服务,新模块就生效了。
2.4、配置文件php.ini
跳转到生成的php-7.4.22安装目录

若/usr/local/lib路径下没有php.ini文件,进行复制操作,有此文件则忽略该操作
cp php.ini-development /usr/local/lib/php.ini
配置文件路径:
/usr/local/lib/php.ini
如何查找配置文件php.ini的位置
方式一:
sudo find / -name php.ini

方式二:
php --ini

2.5、配置Apache服务解析PHP文件
1、检查Apache的配置文件httpd.conf里已调用PHP模块

2、httpd.conf添加如下内容
<FilesMatch "\.ph(p[2-6]?|tml)$">
    SetHandler application/x-httpd-php
</FilesMatch>

3、Apache默认文件路径下创建PHP文件(用于测试)
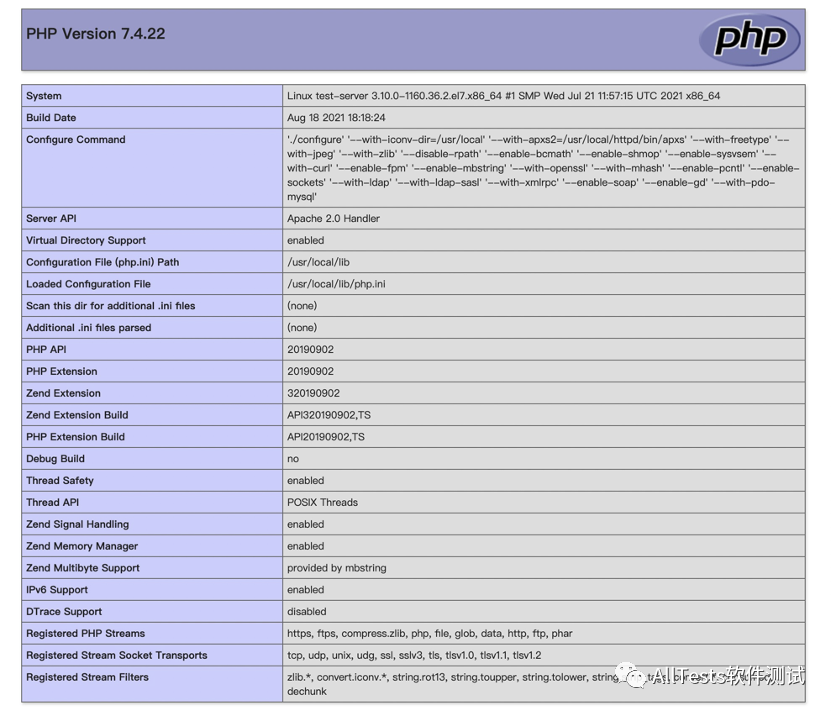
echo '<?php phpinfo();?>' > /usr/local/httpd/htdocs/index.php
4、重启Apache服务,浏览器访问
http://服务器ip/index.php,页面展示如下, 则Apache解析PHP成功。

网站声明:如果转载,请联系本站管理员。否则一切后果自行承担。
- 上周热门
- 银河麒麟添加网络打印机时,出现“client-error-not-possible”错误提示 1323
- 银河麒麟打印带有图像的文档时出错 1236
- 银河麒麟添加打印机时,出现“server-error-internal-error” 1023
- 统信桌面专业版【如何查询系统安装时间】 951
- 统信操作系统各版本介绍 944
- 统信桌面专业版【全盘安装UOS系统】介绍 903
- 麒麟系统也能完整体验微信啦! 889
- 统信【启动盘制作工具】使用介绍 499
- 统信桌面专业版【一个U盘做多个系统启动盘】的方法 440
- 信刻全自动档案蓝光光盘检测一体机 386
- 本周热议
- 我的信创开放社区兼职赚钱历程 40
- 今天你签到了吗? 27
- 信创开放社区邀请他人注册的具体步骤如下 15
- 如何玩转信创开放社区—从小白进阶到专家 15
- 方德桌面操作系统 14
- 我有15积分有什么用? 13
- 用抖音玩法闯信创开放社区——用平台宣传企业产品服务 13
- 如何让你先人一步获得悬赏问题信息?(创作者必看) 12
- 2024中国信创产业发展大会暨中国信息科技创新与应用博览会 9
- 中央国家机关政府采购中心:应当将CPU、操作系统符合安全可靠测评要求纳入采购需求 8

